

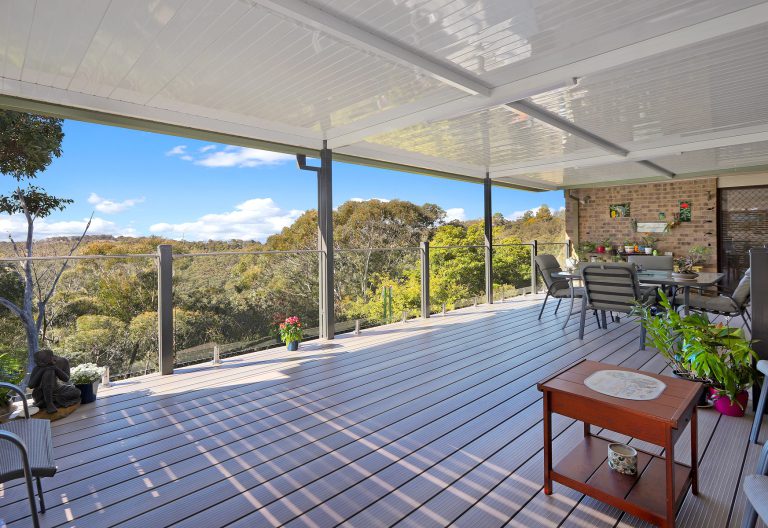
Floating decks are also known as the freestanding decks that rest above from the ground away from all kinds of moisture to keep wood dry and improve its longevity. Special concrete blocks provide support to the entire structure, these are affordable and give your entire deck a low profile. It will not require any special building permit, as long as the height is less than 30 inches above the ground.
The Regulations for Building Floating Decks
You do not need to apply for a permit to build a floating deck, but you need to confirm this with your local administration. In multiple cases, you would be required to adhere to some zone rules for the deck area and positioning of structures within the property. Your local administration would provide the required guidance.
If the deck falls under the range of 30 inches above the surface level. But you should aim to keep the distance to the lowest. The higher distance can increase the risk of a twisted ankle and any other serious injury.
Looking to build your floating decks?
To make the best floating deck, then you need to use the following equipment/tools.
Here’s a complete list of materials/equipment/tools needed:
List of Tools
- One Shovel
- One Rake
- One Tape measure
- One Carpenter’s level
- One Circular saw
- One Drill bit
Materials
- Landscape fabric and gravel (only if you want).
- 9-10 4X8X16- inch blocks of concrete.
- Three deck screws. (½ or 2 ½ inches)
- Ten ft long pressure deck boards (2 x8s).
- Twelve feet long pressure deck boards (2 x8s).
- Twenty-two pressure-treated deck boards (5/4×6 or 2×6).
Here are the steps that you need to follow:
Step 1: Clean & Inspect your deck area
Firstly, you need to clean the area for decking, remove the grass and anything else scattered on the ground. The next step is to move around the deck area and make sure that the surface is even. Lay down the landscape fabric on the soil. You should add gravel on top to make sure that there is no weed growing from under the deck.
Step 2: Put the blocks of concrete in place.
Place 4 concrete blocks in the form of a rectangle, and make sure that these blocks are 12 feet apart on the longer parts when measured from the centre of the concrete blocks.
To identify the same distance, place a block in the centre to make sure that all blocks are spaced evenly. Once you do this you see that the deck would feel more solid. Take an estimated 6/4/2 foot level over the ground and add a straight 12 ft longboard on top. Make sure that the area is levelled out completely. You can add gravel under the blocks as per requirement.
Step 3: Construct the outer Frame
Clean the entire surface (where you want to build your deck) to start building a deck frame. Also, you can build the deck over the blocks of concrete blocks as a base. Cut ten pressure treated 2×8 boards to the length of about 117 inches with a cutting saw.
Carefully measure the two 12 feet boards, (it has to be 12 feet only) and make sure that they are 12 feet only. All the long joists are the end joists. Drill the pilot holes while putting the pieces along using 3 ½ inch decking screws.
Measure from the inside of the frame’s corner and make a pair of marks after every 16 inches along with 12-foot ending joists. Keep making the same mark towards the other ending joists.
You need to add 2 more standard joists across the frame so that there is a set between every pair of layout line making that top of the joists flushed.
Add 2 more standard joists inside the frame, so that there is a set between a pair of layout lines. Drill the pilot holes, and secure them from end joists to the standard joist with 3 ½- inch screws at all ends.
Step 4: Use Framing Connectors
Take metal framing connectors to give more strength to the joints. You can take ninety-degree connectors around the corner, and use a joist hanger, where the standard joists meet with the end joists. Once you have done this, then install all frame connectors with the manufacturer’s approved screws.
Step 5: Position and square the frame
Position your deck frame on the concrete blocks. Make sure that the frame rests on the centre of the concrete blocks. Take diagonal measurements across the opposite corners, if you find both the measurements equal, then the frame is a perfect square.
Step 6: Make sure that the blocks are levelled out
The next thing that you need to do is to make sure that the frame is completely levelled out. In case if you want to increase or decrease the height, then you can add/remove gravel to increase/decrease height respectively.
Step 7: Install all the other joists
Install all standard joists that follow the deck lines. Make sure that you keep all standard joists flushed on top of the end joists.
Step 8: Install Deck boards
Measure all the 12-foot long deck boards, and if they are long then cut them into 144 inches respectively. Put a deck board along the longer side of the deck frame, so that it flushes along the outside face of the end joist. You can put the first and the last boards so that they overhang the end joists by 1 inch for a finished look.
But, make sure that the same does not overhang towards the sides of the frame. Drill the pair of all the pilot holes aligned with the standard joist. Position your holes off-centre without interfering with the frame screws. Attach your deck boards to the two-inch screws in each, and 1-inch thick lumber or 2 ½ inch screws (With a 1 ½ inch thick lumber).
Install the next deck board with two screws along the standard joist, and spacing the two boards by ⅛ inch apart. Install all the remaining decks towards using this, and space them evenly.
Some Additional Tips for Floating Deck
If you are looking to build a floating deck under budget, then pressure-treated wood is a perfect choice. It is a highly durable option for a deck frame and boards. You can go up for cedar or redwood. You can buy these if you want to enhance the looks, as these are not as resistant as the pressure treated wood, despite the natural decay resistance capabilities. The composite deck material is also an eco-friendly option made using recycled wood fibres and plastic, which doesn’t and can survive in all climatic conditions. It is recommended by experts that you should finish the wood with a decking stain or a sealant as soon as the wood is dry again. This is important because if you leave it unfinished then the wood might turn grey and splinter within months.
That’s it, these are the steps by which you can build your own floating without any problem. Make sure that you follow these appropriately and you will your dream floating deck ready!
Need some more help with your floating deck? Contact JVK & Sons Today!
We at JVK and Sons Construction look forward to helping our clients. We care and value your time and investment. We serve across the suburbs of Brisbane, chapel hill, Fairfield, Wavell heights, Carindale, and the neighbourhoods of Donnybrook Moggill.
Our decking experts are ready to work, and we provide services for:
- Timber Decking
- Composite Decking
- Merbau
In case if you have any inquiries then you can contact us directly and get a free assessment today.
Start building your dream deck today!